CT Chromebooks #5 - Removing Apps from your Chromebook

In Chromebooks #4 - Installing Apps, I showed you how to install apps on your Chromebook and your Chrome browser. This is an incredibly easy task if you find that you no longer need the apps that you have installed.

On your Chromebook:


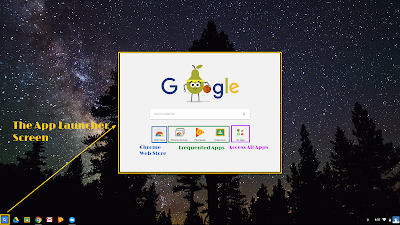
To remove apps from your Chromebook, use the App Launcher and get to all apps. Locate the app that you wish to remove, use a two-finger click or a “ctrl - click” on the app, and select remove from options.


In your Chrome Browser:
In your Chrome browser, locate the “Apps” on the bookmark bar. If you need assistance finding the bookmark bar, check this out.


After, navigate to locate the Chrome App that you want to uninstall. Use a right-click or “ctrl-click” on the icon of the app you no longer want, and select “Remove from Chrome” from the options.


Important Note:
This will not remove apps that are installed in the Windows operating system or remove access to the website associated with the apps in Chrome.

Comments

Popular posts from this blog

Chromebook Shortcut of the Week - 10/14/2016

This weeks shortcut of the week is to help you project your Chromebook. Due to resolutions, your Chromebook will likely default to the “Extended Screen” mode. If they happens, you will see your desktop background on the screen upon plugging in your Chromebook (your Chromebook needs an HDMI connection, if you need a cable, I can get you one!). In order to change this, you will use the “Ctrl + Full Screen” button. This will quickly switch between the two modes, allowing you to switch back and forth. A quick word to the wise, the extended screen is usually to the right!

Google Apps Update - Columns in Google Docs

Awesome news! Google Docs now supports columns of text! Seriously! Just this week, Google announced and updated Google Docs to include support for columns when working within Google Docs. To get there, it is incredibly easy! Step 1:  Highlight the text that you wish to place into columns. Haven't started working yet? Skip the first step! Step 2: Click on the Insert option on the menu bar in Google Docs. Locate and select columns. Step 3:  Select the columns that you wish to have. You have the option for a single column (as the Google Doc is likely already set up), two columns, three columns, or more options. Currently, the maximum number of columns supported is three. Step 4: Check out the new columns in your document! Questions? Please do not hesitate to ask!
This week's Chromebook Keyboard Shortcut of the Week is focused on helping you be more productive, especially with multiple tabs open at once. By using the "Ctrl" key and a number, you can quickly jump to the open tab that corresponds with that number! For instance, if you need to be in tab 3, you can quickly push "Ctrl + 3" to take you to it. Overall, this helps to jump through keys, especially if you are looking at multiple sources of information at the same time. I like to use this to help me jump between tabs without having to move my mouse of find my mouse on my screen! If you have any questions, please let me know!