
There's Nothing Scary about Your Drive - Tips for Organizing - Part Four - Tips to Stay Organized - Lunch & Learns

Part One, Part Two, and Part Three.

Tips for Staying Organized with Google Drive

  1. Name All of Your Files - Google will allow you to have 1000s of “Untitled Document” in your Drive. As a general rule and first step, when creating a new file, give it a name. Speaking of names, check out tip number two for more on names.
  2. Develop a System of Naming Your Files - There are thousands of possibilities, but when I taught Government, economics, and 8th Grade Social Studies, I used a system to designate the files for each class. If the file was for Government class, I would start each file with G-Filename. Economics would have an E and eighth grade would have an 8. This allowed me to quickly sort and place them in their proper folders. I have also seen people use the date, in numeric form, such as 10252016 at the beginning or end of the file name to help them recognize the file. It is up to you, but it is highly recommended that you develop a system to start the naming of you files. The most important thing that you can do here is stick to your plan.
  3. Take a moment - Each week, do not be afraid to take a moment and get your items organized. If being organized helps you be more efficient, it is worth the minute that you have take to do it.
  4. Color Code Your Folders - Color Coding your Folders can help you stay organized as well. When you create a folder, simply use a two-finger click and scroll until you see “Change Color” as an option. While you cannot do it to individual files, you can organize your folders to be color coded.
Change the Colors of Folders
  1. Add the “Shared With Me” to your Google Drive - Take those files out of the extra folder and put them with the rest of your files. It is a quick, easy process. Start by navigating to the “shared with me” area. Then, perform a two-finger or right-click on the file or folder that has been shared with you. Next, select “Add to My Drive” from the list of options. You can also move it to an appropriate folder from the menu as well.
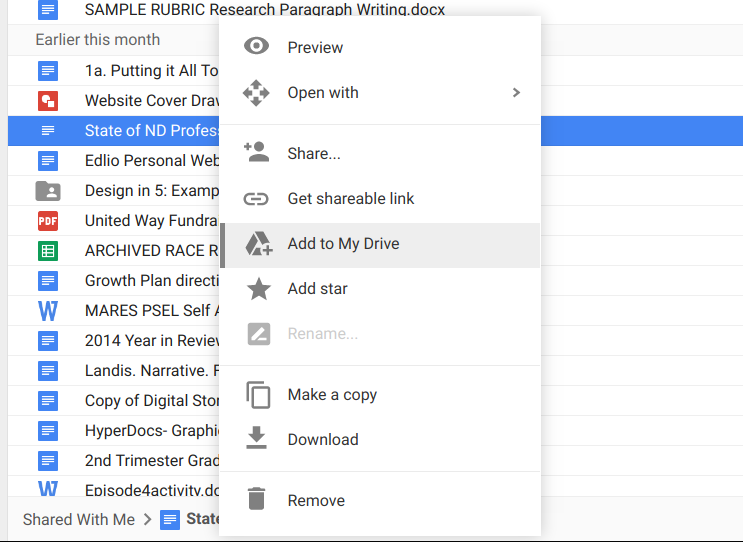
Add to My Drive
Add to My Drive

Comments

Popular posts from this blog

How to Use Google Cast - Wirelessly Display Your Chromebook!

First and foremost, the headline is slightly misleading as you will actually display your Chromebook to your desktop which will be connected with wires. While you will need your Windows PC to connect to the projector, it does not change the fact that you can wirelessly display your Chromebook to students. In my experiments with this both at home and on the school network, I have yet to get the sound to work. (If you would like to connect with the HDMI cable that supports both audio and video, please let me know and I will be sure to get you a cable). To start this process, in your Chrome browser you will need to visit the Chrome Web Store and install the Google Cast for Education app. You will also need to install the Google Cast extension. Next, on your windows desktop open your Google Cast for Education app. You can find it near the top of your browser window. Once you open the app, you should be see a gray screen that names the computer and gives ...

#GoOpen Michigan Reflection

This past week, I had the opportunity to attend a REMC and MDE event on Open Educational Resources (OERs). This event was the launch of a new #GoOpen push within Michigan schools. While OERs have been a part of our school and an option, little has been done to truly push these into the classrooms. The #GoOpen Summit was put on to launch a new initiative in Michigan. Michigan will be launching a database of OERs created by and used by Michigan teachers. This is incredibly powerful. The beginnings of the site can be viewed on this MDE page . The biggest part of the website, something that has been missing from so many OER databases is the fact that these resources will be evaluated before publishing to ensure their openness and their quality. Some of the biggest takeaways from the event is the reminder that there is a significant difference between an Open Educational Resource and something that is free on the internet. The difference comes in the restrictions on use. Some resources, su...

90 Second Chromebook Tips & Tricks - Dock Left. Dock Right.